iOS Push Notifications
Additional iOS setup for rich notifications and background tracking.
Notification Service Extension
The Notification Service Extension has two purposes:
- Rich notifications — Starting with iOS 12.0, Apple enabled applications to receive and display notifications that contain media content such as images. Notifications must be processed by the Notification Service Extension before being shown to the user.
- Background tracking — In order for Ometria to accurately track all notifications received when the app is in quit state, it needs a background service that has access to all notifications.
- Expo
- Bare React Native
If you're using Expo with the Ometria config plugin, the Notification Service Extension is created automatically during npx expo prebuild. No manual Xcode configuration is needed.
The plugin automatically:
- Creates the
OmetriaNotificationServiceExtensiontarget in Xcode - Generates
appGroupIdentifierasgroup.{ios.bundleIdentifier} - Sets up all entitlements (push notifications + app groups) for both targets
- Configures
Info.plistso the native SDK reads the app group value automatically - Adds the required Podfile configuration (
use_frameworks!, NSE pod target)
Plugin Options
Add to your app.json or app.config.js:
{
  "expo": {
    "plugins": [
      ["react-native-ometria"]
    ]
  }
}
If you need a custom app group identifier:
{
  "expo": {
    "plugins": [
      ["react-native-ometria", { "customAppGroupIdentifier": "group.com.custom.identifier" }]
    ]
  }
}
To skip the NSE setup entirely (rich notifications and quit-state tracking will not work):
{
  "expo": {
    "plugins": [
      ["react-native-ometria", { "skipNSE": true }]
    ]
  }
}
After configuring, run:
npx expo prebuild
For bare React Native projects, you must manually set up the Notification Service Extension in Xcode.
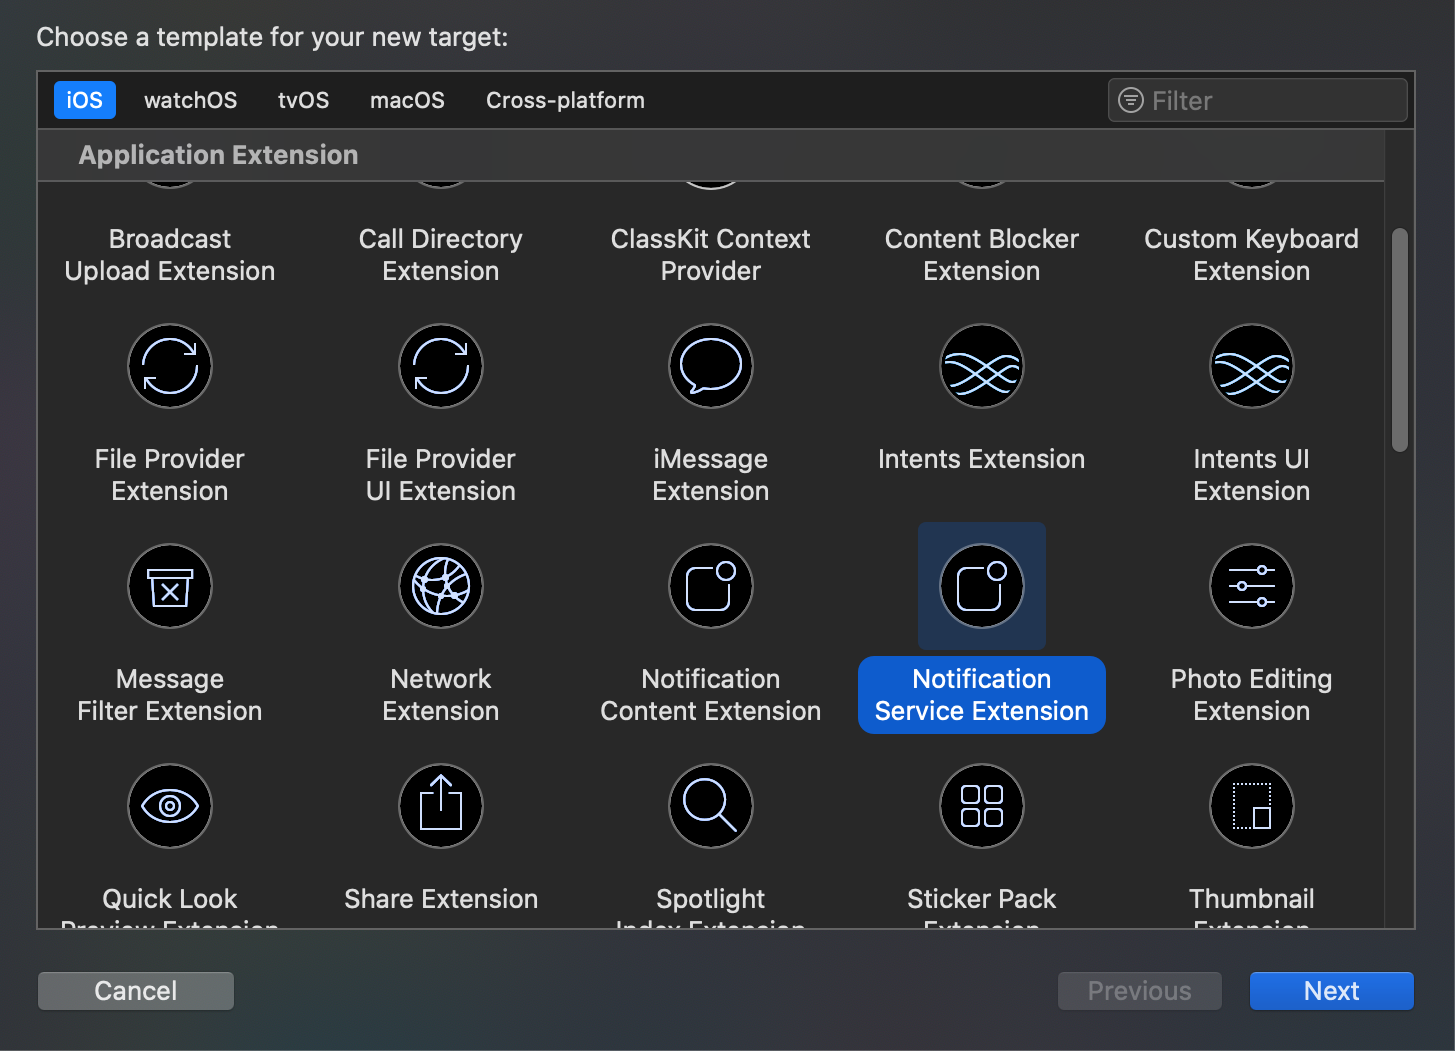
1. Add the Extension Target
- In Xcode, go to File > New > Target
- Select Notification Service Extension > Next
- Name it (e.g.,
NotificationService)
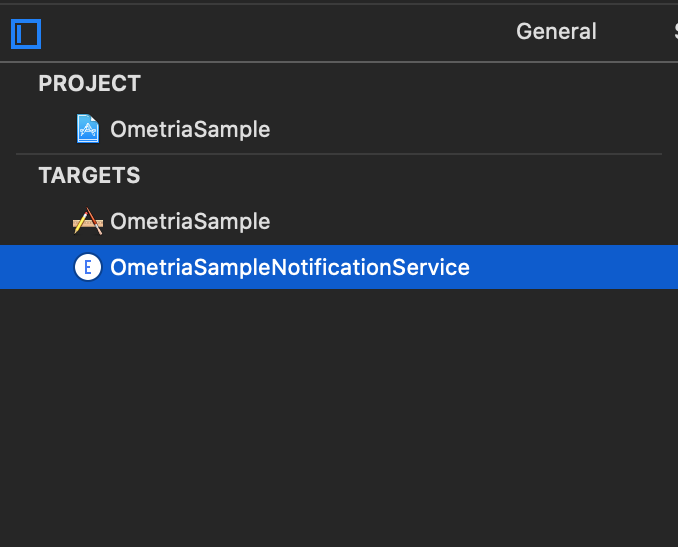
A new item will appear in your target list:
2. Update Podfile
Make sure the Ometria SDK is available to the new target by updating your Podfile:
# Move this line before the App target
pod 'GoogleUtilities', :modular_headers => true

use_frameworks! :linkage => :static

target 'YourApp' do
  # Your app pods
end

# Add the extension target
target 'NotificationService' do
  use_frameworks! :linkage => :static
  pod 'Ometria'
end
Then run:
pod install
3. Create an App Group
The main application and the extension function as two separate entities. In order for the extension to obtain read and write access to data relevant for the SDK, both targets must be in the same App Group.
- In Xcode, select your project in the navigator
- Go to Signing & Capabilities
- Click + Capability in the top left corner and add App Groups
- Add a group identifier (e.g.,
group.com.yourcompany.yourapp) — retain this value as you will need it when initialising Ometria - Repeat the process for the NotificationService extension target
4. Update NotificationService
Open the NotificationService class that was automatically created alongside the extension, and replace its contents with:
import UserNotifications
import Ometria

class NotificationService: OmetriaNotificationServiceExtension {
  override func instantiateOmetria() -> Ometria? {
    Ometria.initializeForExtension(appGroupIdentifier: "group.com.yourcompany.yourapp")
  }
}
5. Initialize with App Group
Update your Ometria initialization to include the app group identifier:
await Ometria.initializeWithApiToken('YOUR_API_KEY', {
  appGroupIdentifier: 'group.com.yourcompany.yourapp',
});
The appGroupIdentifier value must match exactly between:
- The App Group in Xcode Signing & Capabilities (main app target)
- The App Group in Xcode Signing & Capabilities (NotificationService target)
- The
NotificationService.swiftfile - The
initializeWithApiTokencall in your React Native code
Background/Quit State Handling
With the Notification Service Extension configured, notifications received when the app is in quit state will automatically:
- Be tracked as
notificationReceivedevents - Display rich content (images)
No additional React Native code is needed for iOS background handling — the NSE handles everything natively.
For a complete example, see the Expo sample app.